
Verwandte Anleitungen für KONIFERA AS5050


Inhaltszusammenfassung für KONIFERA AS5050
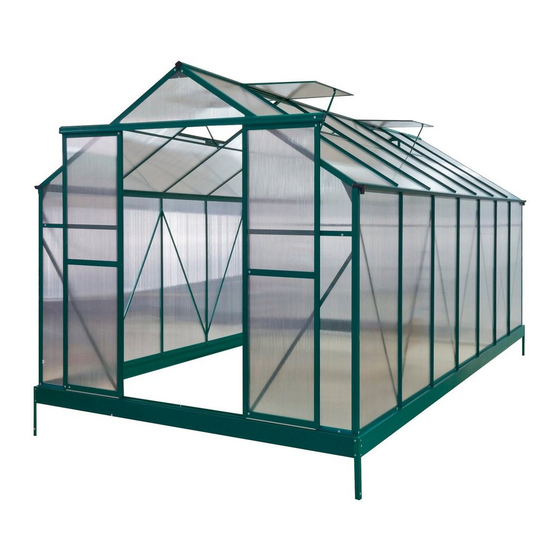
- Seite 1 GEWÄCHSHAUS AS5050 – TEIL 1 AS5050 Part 1 Montageanleitung Istruzioni di montaggio Montagehandleiding Assembly instructions Notice de montage...
-
Seite 2: Sicherheitshinweis
SICHERHEITSHINWEIS • Wir empfehlen Ihnen dringend, während der Montage Handschuhe zu tragen. • Versuchen Sie nicht, das Gewächshaus bei Wind oder Regen zusammenzubauen. • Berühren Sie elektrische Freileitungen nicht mit Aluminiumprofilen. • Tragen Sie stets Schuhe und Schutzbrillen, wenn Sie mit stranggepresstem Aluminium arbeiten. • Entsorgen Sie jegliche Plastiksäcke auf sichere Art und Weise und unzugänglich für Kinder. • Das Gewächshaus muss auf einer ebenen Oberfläche aufgestellt werden. -
Seite 3: Übersicht Über Die Polycarbonatplatte
ÜBERSICHT ÜBER DIE POLYCARBONATPLATTE Rückseite Vorderseite Links Rechts Die UV-geschützte Seite der Platte ist mit einer transparenten Folie überzogen und muss in Richtung Sonne zeigen. INSTALLATION DER SECHSKANTSCHRAUBE Positionieren Sie die Sechskantschraube in die Nut, drehen Sie sie im Uhrzei- gersinn, bis sie festgezogen ist. - Seite 4 TÜR Teil Anz. - 4 -...
- Seite 5 FENSTER Teil Anz. - 5 -...
- Seite 6 F4(5x) F4(5x) F4(4x) F4(5x) F4(5x) F4(5x) F4(5x) Teil Anz. - 6 -...
- Seite 7 Teil Anz. F4(2x) 10R & 10L F4(1x) F4(1x) F4(2x) F4(2x) F4(1x) - 7 -...
- Seite 8 F4(2x) F4(2x) Teil Anz. - 8 -...
- Seite 9 F4(3x) F4(1x) F4(2x) F4(3x) F4(2x) F4(1x) Teil Anz. - 9 -...
- Seite 10 F4(2x) Teil Anz. - 10 -...
- Seite 11 F4(1x) F4(2x) F4(2x) Teil Anz. - 11 -...
- Seite 12 F4(1x) F4(1x) F4(1x) F4(1x) F4(2x) F4(2x) Teil Anz. - 12 -...
- Seite 13 Teil Anz. Tür - 13 -...
- Seite 14 Teil Anz. F4(2x) F4(5x) Anmerkung: Setzen Sie 5 Schrauben in die zwei Bauteile 20 wie in Abbildung (1) dargestellt ein. Setzen Sie 4 Schrauben in die verbleibenden Bauteile 20 wie in Abbildung 82) dargestellt ein. F4(4x) - 14 -...
- Seite 15 Anmerkung: B7 wird verwendet, um die Fensterführung W4 zu halten, wenn das Fenster geschlossen ist. Teil Anz. - 15 -...
- Seite 16 MONTAGESKIZZE FÜR DIE VERSTÄRKUNG DER TÜRSCHWELLE, DES OBEREN BEREICHS UND DER SEITENWAND Teil Anz. - 16 -...
- Seite 17 Teil Anz. - 17 -...
- Seite 18 Teil Anz. - 18 -...
- Seite 19 Teil Anz. - 19 -...
- Seite 20 Teil Anz. - 20 -...
- Seite 21 Teil Anzahl - 21 -...
- Seite 22 Nr. • No. • n° Teil 1 Typ • Type • Tipo AS5050 Produktberatung: 01806/ 63 06 30 Festnetz 20 Cent/Anruf, Mobilfunk max. 60 Cent/Anruf Quelle D Fachberatung: 01806/111 100 Festnetz 20 Cent/Anruf, Mobilfunk max. 60 Cent/Anruf call center telefoonnummer 0900-1901 15 ct/min Universal: 0043/662/4485 59 Fachberatung Heimwerken (zum Festnetztarif –...
- Seite 23 SERRE AS5050 – DEEL 1 AS5050 Part 1 Montageanleitung Istruzioni di montaggio Montagehandleiding Assembly instructions Notice de montage...
-
Seite 24: Algemene Aanwijzing
VEILIGHEIDSINSTRUCTIE • We raden u met aandrang aan om tijdens de montage handschoenen te dragen. • Probeer niet om de serre bij wind of regen te monteren. • Raak elektrische open leidingen niet aan met aluminium profielen. • Draag steeds schoenen en veiligheidsbril als u met geëxtrudeerd aluminium werkt. •... - Seite 25 OVERZICHT VAN DE POLYCARBONAATPLATEN Achterzijde Voorzijde Links Rechts De uv-beschermde zijde van de plaat is overtrokken met een transparante folie en moet richting de zon wijzen. INSTALLATIE VAN DE ZESKANTSCHROEF Positioneer de zeskantschroef in de groef, draai deze naar rechts tot deze vastgedraaid is.
- Seite 26 DEUR Aant. DERDEEL - 26 -...
- Seite 27 VENSTER Aant. DERDEEL - 27 -...
- Seite 28 F4(5x) F4(5x) F4(4x) F4(5x) F4(5x) F4(5x) F4(5x) Aant. DERDEEL - 28 -...
- Seite 29 ONDER- Aant. DEEL F4(2x) 10R & 10L F4(1x) F4(1x) F4(2x) F4(2x) F4(1x) - 29 -...
- Seite 30 F4(2x) F4(2x) ONDER- Aant. DEEL - 30 -...
- Seite 31 F4(3x) F4(1x) F4(2x) F4(3x) F4(2x) F4(1x) ONDER- Aant. DEEL - 31 -...
- Seite 32 F4(2x) ONDER- Aant. DEEL - 32 -...
- Seite 33 F4(1x) F4(2x) F4(2x) ONDER- Aant. DEEL - 33 -...
- Seite 34 F4(1x) F4(1x) F4(1x) F4(1x) F4(2x) F4(2x) ONDER- Aant. DEEL - 34 -...
- Seite 35 ONDER- Aant. DEEL DEUR - 35 -...
- Seite 36 ONDER- Aant. DEEL F4(2x) F4(5x) Opmerking: Plaats 5 schroeven in de twee componenten 20 zoals op de afbeelding (1) weergegeven. Plaats 4 schroeven in de achterblijvende componenten 20 zoals op de afbeelding (2) weergegeven. F4(4x) - 36 -...
- Seite 37 Opmerking: B7 wordt gebruikt om de venstergeleiding W4 te fixeren als het venster gesloten is. ONDER- Aant. DEEL - 37 -...
- Seite 38 MONTAGESCHETS VOOR DE VERSTEVIGING VAN DE DEURDREMPEL, HET BOVENSTE BEREIK EN VAN DE ZIJWAND ONDER- Aant. DEEL - 38 -...
- Seite 39 ONDER- Aant. DEEL - 39 -...
- Seite 40 ONDER- Aant. DEEL - 40 -...
- Seite 41 ONDER- Aant. DEEL - 41 -...
- Seite 42 ONDER- Aant. DEEL - 42 -...
- Seite 43 ONDER- Aant. DEEL - 43 -...
- Seite 44 Nr. • No. • n° Deel 1 Typ • Type • Tipo AS5050 Produktberatung: 01806/ 63 06 30 Festnetz 20 Cent/Anruf, Mobilfunk max. 60 Cent/Anruf Quelle D Fachberatung: 01806/111 100 Festnetz 20 Cent/Anruf, Mobilfunk max. 60 Cent/Anruf call center telefoonnummer 0900-1901 15 ct/min Universal: 0043/662/4485 59 Fachberatung Heimwerken (zum Festnetztarif –...
- Seite 45 SERRE AS5050 – PARTIE 1 AS5050 Part 1 Montageanleitung Istruzioni di montaggio Montagehandleiding Assembly instructions Notice de montage...
- Seite 46 CONSIGNE DE SECURITE • Nous recommandons fortement d’utiliser des gants de travail pendant cet assemblage. • N’essayez pas d’assembler cette serre dans des conditions venteuses ou humides. • Ne touchez pas des câbles électriques situés au-dessus de la tête avec les profilés en aluminium. • Portez toujours des chaussures et des lunettes de sécurité lorsque vous travaillez avec de l’aluminium extrudé...
- Seite 47 RECAPITULATIF CONCERNANT LE PANNEAU POLYCARBONATE Arrière Avant Gauche Droite Le côté protégé contre les UV de la feuille est couvert d’un film transparent et doit être orienté vers le soleil. INSTALLATION « VIS HEXAGONALE » Placez la « vis hexagonale » dans la rainure, la tourner dans le sens des aiguilles d’une montre jusqu’à...
- Seite 48 PORTE Piece Qté. - 48 -...
- Seite 49 FENETRE Piece Qté. - 49 -...
- Seite 50 F4(5x) F4(5x) F4(4x) F4(5x) F4(5x) F4(5x) F4(5x) Piece Qté. - 50 -...
- Seite 51 Piece Qté. F4(2x) 10R & 10L F4(1x) F4(1x) F4(2x) F4(2x) F4(1x) - 51 -...
- Seite 52 F4(2x) F4(2x) Piece Qté. - 52 -...
- Seite 53 F4(3x) F4(1x) F4(2x) F4(3x) F4(2x) F4(1x) Piece Qté. - 53 -...
- Seite 54 F4(2x) Piece Qté. - 54 -...
- Seite 55 F4(1x) F4(2x) F4(2x) Piece Qté. - 55 -...
- Seite 56 F4(1x) F4(1x) F4(1x) F4(1x) F4(2x) F4(2x) Piece Qté. - 56 -...
- Seite 57 Piece Qté. Porte - 57 -...
- Seite 58 Piece Qté. F4(2x) F4(5x) Remarque : Insérez 5 vis dans les deux 20 comme montré dans la figure (1). Insérez 4 vis dans les 20 restants comme montré dans la figure (2). F4(4x) - 58 -...
- Seite 59 Remarque : B7 est utilisée pour maintenir le guide de fenêtre W4 lorsque la fenêtre est fermée. Piece Qté. - 59 -...
- Seite 60 COMPOSANT DESTINÉ À RENFORCER LE SEUIL, LA PIÈCE DE SOMMET ET LA PAROI LATÉRALE SCHEMA D’INSTALLATION Piece Qté. - 60 -...
- Seite 61 Piece Qté. - 61 -...
- Seite 62 Piece Qté. - 62 -...
- Seite 63 Piece Qté. - 63 -...
- Seite 64 Piece Qté. - 64 -...
- Seite 65 Piece Qté. - 65 -...
- Seite 66 Nr. • No. • n° Partie 1 Typ • Type • Tipo AS5050 Produktberatung: 01806/ 63 06 30 Festnetz 20 Cent/Anruf, Mobilfunk max. 60 Cent/Anruf Quelle D Fachberatung: 01806/111 100 Festnetz 20 Cent/Anruf, Mobilfunk max. 60 Cent/Anruf call center telefoonnummer 0900-1901 15 ct/min Universal: 0043/662/4485 59 Fachberatung Heimwerken (zum Festnetztarif –...
- Seite 67 SERRA AS5050 – PARTE 1 AS5050 Part 1 Montageanleitung Istruzioni di montaggio Montagehandleiding Assembly instructions Notice de montage...
-
Seite 68: Avvisi Di Sicurezza
AVVISI DI SICUREZZA • Si raccomanda l’uso di guanti durante il montaggio. • Non iniziare il montaggio della serra in caso di pioggia e vento. • Fare attenzione a non toccare le linee elettriche con i profili in alluminio. • Durante il lavoro con l’alluminio estruso, indossare scarpe di sicurezza e occhiali protettivi. •... - Seite 69 PROSPETTO DEI PANNELLI IN POLICARBONATO Retro Fronte Sinistra Destra Il lato del pannello protetto dai raggi UV è rivestito e deve essere rivolto verso il sole. INSTALLAZIONE DELLA VITE ESAGONALE Posizionare la vite esagonale nella scanalatura, stringerla avvitandola in senso orario.
- Seite 70 PORTA QUAN- PEZZO TITÀ - 70 -...
- Seite 71 FINESTRA QUAN- PEZZO TITÀ - 71 -...
- Seite 72 F4(5x) F4(5x) F4(4x) F4(5x) F4(5x) F4(5x) F4(5x) QUAN- PEZZO TITÀ - 72 -...
- Seite 73 QUAN- PEZZO TITÀ F4(2x) 10R & 10L F4(1x) F4(1x) F4(2x) F4(2x) F4(1x) - 73 -...
- Seite 74 F4(2x) F4(2x) QUAN- PEZZO TITÀ - 74 -...
- Seite 75 F4(3x) F4(1x) F4(2x) F4(3x) F4(2x) F4(1x) QUAN- PEZZO TITÀ - 75 -...
- Seite 76 F4(2x) QUAN- PEZZO TITÀ - 76 -...
- Seite 77 F4(1x) F4(2x) F4(2x) QUAN- PEZZO TITÀ - 77 -...
- Seite 78 F4(1x) F4(1x) F4(1x) F4(1x) F4(2x) F4(2x) QUAN- PEZZO TITÀ - 78 -...
- Seite 79 QUAN- PEZZO TITÀ Porta - 79 -...
- Seite 80 QUAN- PEZZO TITÀ F4(2x) F4(5x) Nota: Inserire le 5 viti nelle 2 componenti 20 come indicato nella figura (1). Inserire le 4 viti nelle restanti componenti 20 come indicato nella figura (2). F4(4x) - 80 -...
- Seite 81 Nota: B7 serve per reggere la guida della finestra W4 a finestra chiusa. QUAN- PEZZO TITÀ - 81 -...
- Seite 82 SCHEMA DI MONTAGGIO PER IL RINFORZO DELLA SOGLIA DELLA PORTA, DELLA PARTE SUPERIORE E DELLA PARETE LATERALE PEZZO QUANTITÀ - 82 -...
- Seite 83 QUAN- PEZZO TITÀ - 83 -...
- Seite 84 QUAN- PEZZO TITÀ - 84 -...
- Seite 85 QUAN- PEZZO TITÀ - 85 -...
- Seite 86 QUAN- PEZZO TITÀ - 86 -...
- Seite 87 QUAN- PEZZO TITÀ - 87 -...
- Seite 88 Nr. • No. • n° Parte 1 Typ • Type • Tipo AS5050 Produktberatung: 01806/ 63 06 30 Festnetz 20 Cent/Anruf, Mobilfunk max. 60 Cent/Anruf Quelle D Fachberatung: 01806/111 100 Festnetz 20 Cent/Anruf, Mobilfunk max. 60 Cent/Anruf call center telefoonnummer 0900-1901 15 ct/min Universal: 0043/662/4485 59 Fachberatung Heimwerken (zum Festnetztarif –...
- Seite 89 GREENHOUSE AS5050 – PART 1 AS5050 Part 1 Montageanleitung Istruzioni di montaggio Montagehandleiding Assembly instructions Notice de montage...
- Seite 90 - 90 -...
- Seite 91 - 91 -...
- Seite 92 - 92 -...
- Seite 93 - 93 -...
- Seite 94 - 94 -...
- Seite 95 - 95 -...
- Seite 96 - 96 -...
- Seite 97 - 97 -...
- Seite 98 - 98 -...
- Seite 99 - 99 -...
- Seite 100 - 100 -...
- Seite 101 - 101 -...
- Seite 102 - 102 -...
- Seite 103 - 103 -...
- Seite 104 - 104 -...
- Seite 105 - 105 -...
- Seite 106 - 106 -...
- Seite 107 - 107 -...
- Seite 108 - 108 -...
- Seite 109 Part Qty. - 109 -...
- Seite 110 Nr. • No. • n° Part 1 Typ • Type • Tipo AS5050 Produktberatung: 01806/ 63 06 30 Festnetz 20 Cent/Anruf, Mobilfunk max. 60 Cent/Anruf Quelle D Fachberatung: 01806/111 100 Festnetz 20 Cent/Anruf, Mobilfunk max. 60 Cent/Anruf call center telefoonnummer 0900-1901 15 ct/min Universal: 0043/662/4485 59 Fachberatung Heimwerken (zum Festnetztarif –...